Day 1 of Hanging:
 Day 7
Day 7 of Hanging:
 Not much has changed. It is still pretty soft and the outside hasn't really dried all that much. Which I think means things are going smoothly. The weather has been colder than normal the past few days and when I took the temperature of the box today, it was at 53 degrees. So, they might take just a few days longer than expected.Day 14
 of Hanging:
 They are slowly drying out, though it is very hard to tell. On Day 21, I'll scale them and we will see how much weight they have lost.
On about day 11, I noticed bad mold starting to grow on them. It put me in quite a bad mood. I was honestly expecting either no mold or the nice powdery good mold to appear, as I had been exceptionally clean and had all the correct conditions. I read a few forums and went over the books. It turns out this is not all that unusual. I cleaned off the mold with a highly salty water and a clean rag. The stuff just wiped off, and since I caught it early, there was no damage to my casings. I also submerged the sausages in some white vinegar then dried them and rehung them. So far, I haven't seen a trace of any mold, and hopefully won't again.
Also, I got some nice clippy things to hang the sausages on. It makes things so much easier.
Day 21 of Hanging:  So they are visibly drying out now.
I figured out my problem with the mold. My humidity was entirely too high. I am now letting them dry out with the door open. The temperature has remained near 60 degrees and the humidity stays around 70.
They have only lost about 15% to 17% of their initial weight. They need to lose 30%. The large amount of humidity has most likely hindered their drying.
I am somewhat pessimistic about their final outcome. But I am happy that I am learning this.
Day 28 of Hanging: They have now lost about 25% of their weight. They are still way too soft to the touch. Again, I am pessimistic about how they will turn out.
Day 35 of Hanging:
 They still have not reached the 30% weight loss mark. The initial high humidity has really screwed them up. Though they have hardened up considerably, they are still soft to the touch. I am also put off by the smell of the vinegar that I rubbed them with to get the mold off. I am set to see these through, but I have serious doubts as to whether they will be any good.
So this is my first go at dry curing.
I decided to go with the Tuscan Salami recipe from
Charcuterie. Well, slightly altered. I went with:
11lb 8oz Boneless Pork Butt
3lb Fatback
6oz Kosher Salt
18grams InstaCure #2
6oz Distilled Water
4grams Bactoferm
90grams Dextrose
210grams Nonfat Dry Milk Powder
36grams Fennel Seeds, toasted and cracked
36grams black pepper
18grams garlic, minced
12oz Chianti
Hog Middles (45mm & Up)
I used 8oz less pork butt, simply because this was the amount that I ended up with after I diced it, and figured it was close enough to 12lb. So, rather than me grabbing a little more pork or adjusting the recipe, I just went with it.
The other adjustment I made was with the bactoferm. The recipe calls for something like 90 grams. The packet I got in was a 25 gram packet that said it was enough for 200k of meat! So, I decided to go with just 4 grams.
I first diced the fat back & chilled it to close to freezing.

Then I ran it through the grinder with my large die into a bowl set over ice.
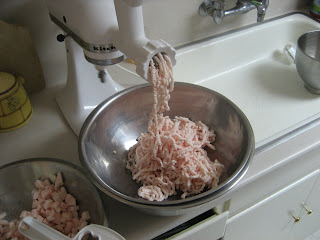
Next I diced my pork. I seasoned it with the kosher salt and the InstaCure. Then I threw it into my freezer & partially froze it.

Then I ran it through the grinder with my small die into a bowl set over ice.
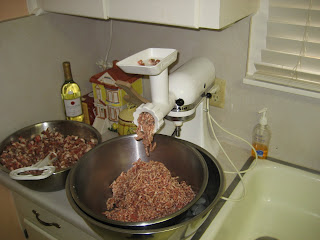
I chilled the fat and the meat separately. Then I combined them by hand in a large bowl.
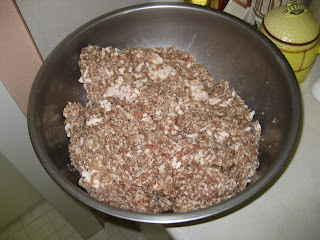
I measured off the bactoferm and added it to 3/4 cup of distilled water that I had at room temperature. I gave it about 10 minutes to wake up and then added it to the meat.
I put the meat into 20 quart mixing bowl that I had frozen with the paddle attachment. I added the rest of the ingredients to the meat.
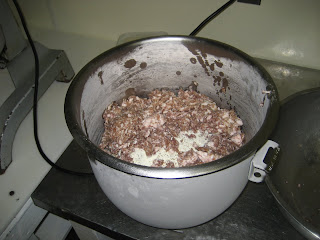
Next, I mixed it on low until it all came together and it was nice and sticky. Which, only took a minute.
Here it is all nice and together:
I then added some of the sausage to my sausage stuffer.
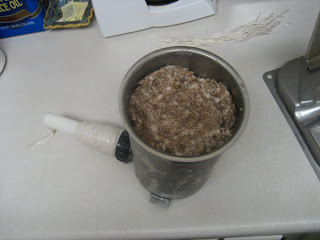
I had soaked one of the hog middles in water & kept it in my fridge over night. I took the casing out of the water and rinsed it off, both inside and out. Then I put it over my stuffer.
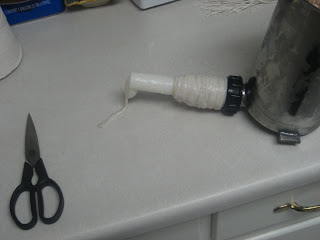
I then got to stuffing. My first casing I tried to stuff a little too much, and it burst. So, I was a little more careful from there on.


I tied them off at about a foot long.
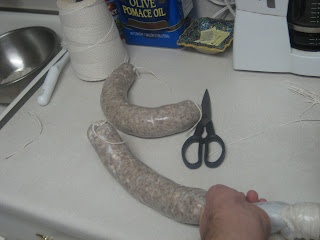
I ended up with 14 total sausages. I then pricked them all over with a clean needle to remove any air pockets and help facilitate the drying process.

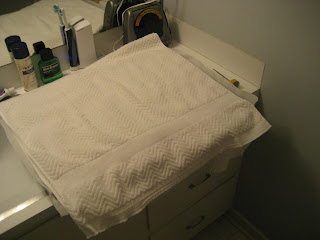
I then had to incubate them. 12 hours at 85 degrees was what the recipe recommended. I turned on the space heater near my bathtub and put the sausages in the room next to it with the door somewhat cracked. I covered the sausages with a clean towel & went to bed. The next day, I took the temperature of the room. 86 degrees. Which made me extremely happy.
After they were done incubating, I trussed them and scaled them. When they are done, they will have lost around 30% of their weight. So, scaling them will help me better determine when they have reached their doneness.
I had an old freezer put into a building we have out at the camp. The building is the bottom part of Byrd House for those of you familiar with the camp. It is built into the side of a hill, so it is the closest thing I have to a cellar. The temperature stays in the low to mid 60s which makes it ideal for dry curing.
I hung them in the old freezer, which is unplugged. The freezer will help keep the sausages out of sunlight and help me regulate the amount of humidity they get.
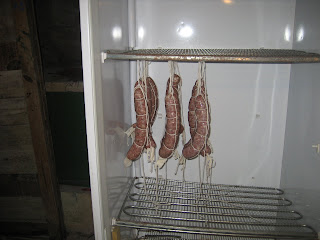
I placed a container of water in the freezer. This will help give it some humidity, which will prevent the outside from drying out before the inside. I also salted the water to prevent mold from growing in it.

So there it is.
The sausages are putting off a sour smell similar to breadmaking. Which means that the beneficial bactoferm was well incubated.
The casings are a little smaller than I had hopped for, but I am still glad I used natural casings and that I went with pork rather than beef middles.
We will see how they end up. I'll update this every 6-7 days to show how it has progressed.
 I went over to Edward & ML's house the other night and we made granola.
 Heat it on Medium to Medium High, stirring occasionally, till it is all melted and uniform. Let it cool off heat for 15 minutes.
 Mix all your dry ingredients (oats, coconut, pecan pieces, sliced almonds, sunflower seeds and wheat germ) together in a mixing bowl.
 Add in the somewhat cooled wet ingredients. Mix with a spoon for a little bit and then use your hands to mix it all together.
 Next, spread out the granola mixture onto a sheet pan. (Again, we did a double batch, which is why you see 2 pans.)
 Bake in a 350 degree oven for 15 minutes.
 Using a metal spatula, spread the mixture around. Try and break up any large clumps. Return it to the oven for about 6 minutes.
 Pull it out and then mix it around with the metal spatula again.

 So, after you get it all nice and toasted you need to let it cool. Every five minutes or so, stir it around so it doesn't clump all up.
 It should only take about 3 times of doing this during the cooling process till you get it where you want it.
 Put it in zip lock bags or in Tupperware. Make sure it is completely cooled before sealing it. The granola should last for at least 2 weeks sealed at room temperature.


